

I wrote about working with Logstash in Windows environments way back in 2017. There have been several updates to Logstash along with several fundamental changes to it's core architecture so I think it is time to post an update.
If you haven't read my previous article about Logstash, go back and check it out for some context. Otherwise, let's get started!
This article describes the process for how to install Logstash on a Windows workstation or Windows server. The installation concepts for Logstash are the same on both desktop and server. This guide works for current supported versions of Logstash (v6.x and v7.x at the time of this writing) but should work for future versions as well.
The purpose of running Logstash on your local workstation is for testing out various filter configurations before adding them to a production Logstash instance. With that being said, there are a few pre-requisites for running Logstash, besides making sure that Windows is fully updated.
If you intend on installing Logstash on a Windows Server, then naturally this would mean you are going to run Logstash as a service 24/7. So for this example I'm going to use Windows Server 2019.
Supported versions of Java
Logstash requires the Java Development Kit (JDK), not the Java Runtime Environment (JRE). And for those that are not aware, Java 8 is now depreciated. While security updates will be available publically until March 2022, since Java 8 is now being supported in a depreciated state it is a wise idea to run the latest long-term support (LTS) version of Java - which is Java 11.
It is true that Logstash v6.7.x and v7.0.x versions of Logstash support both Java 8 and Java 11. However there are still some small bugs in v7.0 of Logstash if it is running on top of Java 11. One of the bugs has to do with the logstash-input-jdbc plugin. So for the moment it is still a good idea to run Java 8. The Elastic engineers are amazing so I'm sure that when the Elastic Stack v7.1.0 is released all of the various Java 11 issues will be fixed.
Besides the basic version differences, there are two different releases of the JDK. There is the Oracle JDK and OpenJDK. For simplicity's sake I'm going to use the Oracle JDK 8 since it is much easier to install and configure.
Install and Configure Oracle JDK 8 for Windows
I'll walk through setting up the JDK since there are a few special steps to get it working correctly in Windows for Logstash.
- Fully update Windows and reboot.
- Download and install JDK 8 for Windows. Choose all defaults.
- Click Start, search for Environment Variables and open the system properties applet. The advanced tab of the System Properties applet should appear.
- Click the Environment Variables button.
- Under System variables click New.
- Enter the variable name
JAVA_HOMEand browse to the JDK install directory and click OK. It will look similar to this:
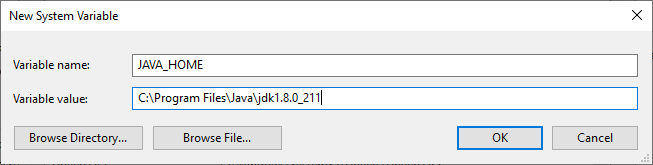
As you can see in this example I installed JDK 8 update 211. If you installed a different version, or installed on a different volume, then naturally your directory path will be different.
At this point the JDK is now installed and good to go. Now it is time to install and configure Logstash.
First Time Install and Setup of Logstash
Let's download and install Logstash 7.
- Download the Logstash ZIP package from here - https://www.elastic.co/downloads/logstash.
- Extract the ZIP contents to a local folder. For this example I will extract the contents to
C:\logstash\. - Edit the
C:\logstash\config\jvm.optionsfile. Change the Xmx and Xms memory settings to half of the available system memory. If you have 4GB of system memory, then the setting should look like the following:
-Xms2g
-Xmx2g
Save the file and exit.
- Create a new logstash pipeline file at
C:\logstash\bin\logstash.conf.
Copy/paste the text below in thelogstash.conffile...
input {
    # Accept input from the console.
    stdin{}
}

filter {
    # Add filter here. This sample has a blank filter.
}

output {
    # Output to the console.
    stdout {
            codec => "rubydebug"
    }
}
The example configuration provided will accept input from the console as a message then will output to the console in JSON.
That's it! Logstash is installed with a basic configuration.
Running Logstash
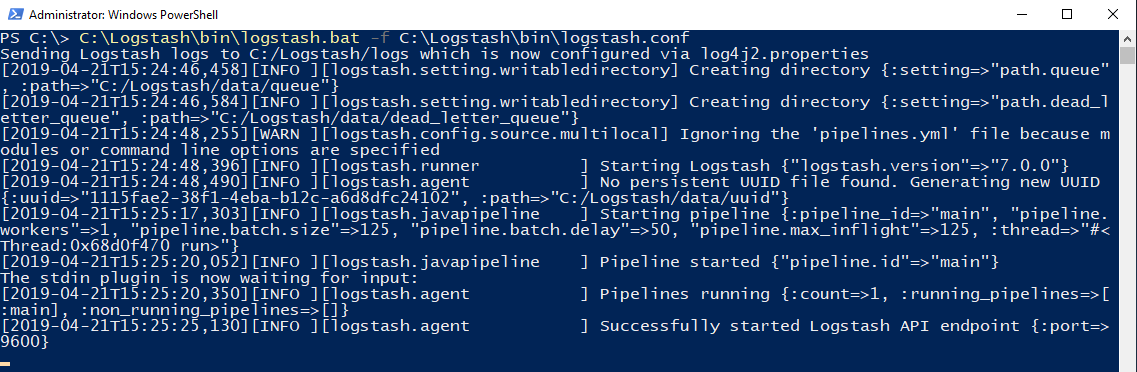
To start Logstash, run the batch file in .\bin\logstash.bat with the -f flag and define the location of the conf file.
For example, execute this from Powershell:
c:\logstash\bin\logstash.bat -f c:\logstash\bin\logstash.conf
If all goes well, after a moment you'll see the final line in the console say Successfully started Logstash API endpoint. It will look something like this...
To stop Logstash simply press CTRL+C to stop the running batch process.
Installing Logstash as a Windows service
Download the Non-Sucking Service Manager (NSSM) from http://nssm.cc.
Extract the EXE to the BIN directory of the Logstash location.
Navigate to the logstash BIN directory, execute the following from the shell:
.\nssm.exe install logstash
- Path: This will be the full path of where the
LOGSTASH.BATfile is located. For exampleD:\elastic\logstash\bin\logstash.bat. - Startup Directory: Enter the full path of the BIN directory. For example
D:\elastic\logstash\bin\ - Arguments: Include the '-f' flag with the path of the logstash config file. For example,
-f d:\elastic\logstash\bin\logstash.conf. - On the details tab ensure the service is set to start up automatically.
- Also on the details tab, ensure the service is set to use a service account. This is especially important in highly secure or AD-DS environments.
- Click "Install Service".
Open up Windows services and start the service.
Final Notes
So that is it! Running Logstash on Windows isn't as difficult as one may expect. The install and configuraiton process also has not changed much between versions 5, 6, and 7. The tricky stuff all has to do with the Java configuration for Windows and the initial pipeline configuration.
As always make sure you reference the official documentation if you have any questions. The official public Elastic forums are also a great place for various questions you may have.
- Joey D